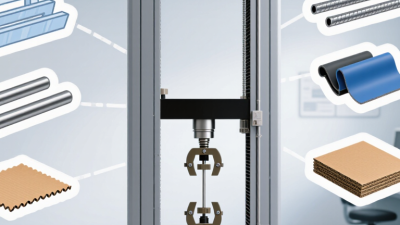
10 Tips for Buying the Right Tensile Tester?
Choosing the right tensile tester is more than comparing maximum force, speed, or purchase price. It is a decision about measurement confidence. A machine may look impressive in a brochure yet perform poorly with thin films, elastomers, wires, or rigid plastics. ASTM E8/E8M and ISO 7500-1 show why test geometry, force accuracy, calibration, and reporting conditions matter. These standards provide practical benchmarks for selecting equipment that can produce repeatable and defensible results.
Recent market analyses from Grand View Research and MarketsandMarkets describe steady growth in tensile testing equipment, driven by plastics, automotive, aerospace, packaging, and medical manufacturing. However, market growth does not make every model suitable. A laboratory testing a 2-millimeter polymer strip needs different grips and extensometer sensitivity than a factory testing steel coupons. The wrong fixture can slip, damage the specimen, or create misleading elongation data. It happens more often than buyers admit.
This guide presents ten practical tips for buying the right tensile tester. It examines load capacity, test speed, frame stiffness, gripping systems, extensometers, software, calibration, safety, environmental control, and after-sales support. It also considers total ownership cost, including installation, training, maintenance, and replacement parts. NIST guidance on measurement traceability reinforces the value of documented calibration and reliable records. A lower initial price can become expensive later.
There is no universal best machine. Your samples decide.
Before requesting quotations, define the materials, specimen dimensions, test standards, expected throughput, and reporting requirements. A careful specification prevents attractive but unsuitable equipment from entering the laboratory.
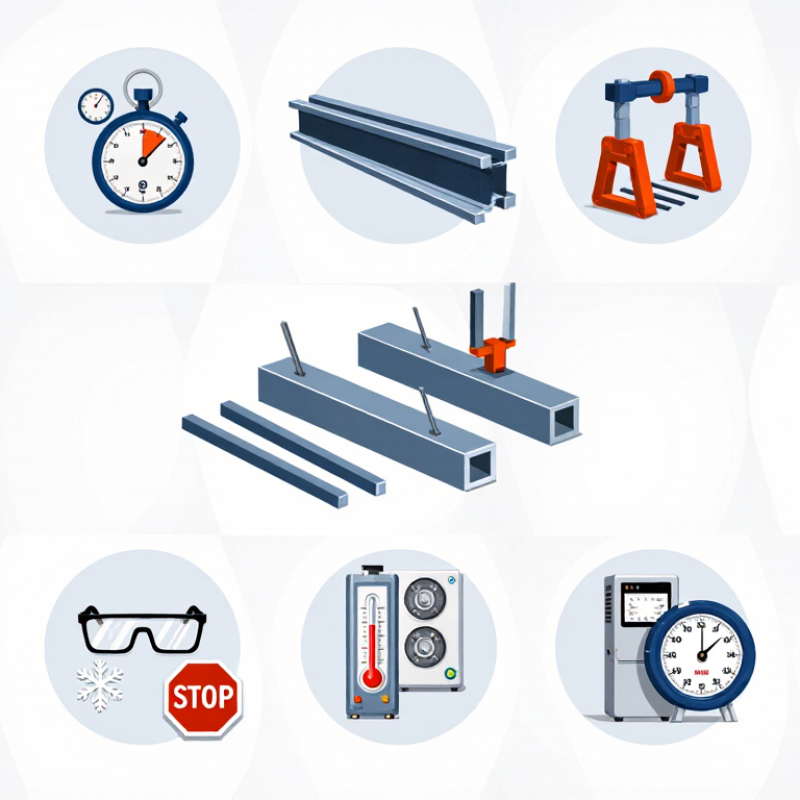
Define Your Testing Requirements and Material Characteristics
10 Tips for Buying the Right Tensile Tester?
Before choosing a tensile tester, define exactly what the machine must measure. Identify tensile strength, elongation, modulus, yield behavior, and failure mode. Record material thickness, width, specimen shape, and expected load range. A thin plastic film needs different grips and sensitivity than a thick metal bar. Do not start with machine capacity. Start with the material.
Consider the real testing environment. Temperature and humidity can change polymer results significantly. Testing speed also affects force, elongation, and fracture behavior. Write down the required crosshead speed, sampling rate, gauge length, and test frequency. In practical laboratory work, unclear requirements often create more problems than weak equipment. I have seen acceptable machines produce unreliable data because the grips damaged soft specimens. Small details matter.
Select a load cell that matches the expected force without operating near its limit. Check whether the frame supports interchangeable grips, extensometers, and future fixtures. Confirm calibration traceability and measurement uncertainty before purchase. The software should record raw data, specimen dimensions, test speed, and environmental conditions. Match the procedure with the relevant ASTM, ISO, or internal method. Then test several representative samples, not just one perfect specimen. A polished demonstration can hide limitations. That assumption fails. Leave room for review, because your first requirement list may be incomplete.
Compare Force Capacity, Accuracy, and Measurement Range
10 Tips for Buying the Right Tensile Tester
Compare Force Capacity, Accuracy, and Measurement Range
Choosing a tensile tester begins with the material, not the machine.
Tip 1: List your strongest expected sample.
Tip 2: Select force capacity above that load, but avoid excessive capacity. Oversizing can reduce measurement sensitivity.
Tip 3: Check accuracy across the working range. A tester may perform well near full capacity but poorly at low loads.
Tip 4: Confirm whether accuracy means reading accuracy, system accuracy, or both.
Tip 5: Match the measurement range to real test results.
Tip 6: Examine force resolution and repeatability. Small differences matter when comparing thin films, fibers, or delicate components.
Tip 7: Review displacement accuracy, especially for flexible materials.
Tip 8: Check the frame’s travel distance. A short travel path can stop a test early. That mistake is easy to miss.
Tip 9: Consider the grips carefully. They must hold samples firmly without cutting or slipping.
Tip 10: Request calibration records and test data from similar materials.
In practical laboratory work, I also inspect software controls and emergency stopping functions. They affect daily reliability.
One overlooked detail is temperature control. Some materials change noticeably with heat or humidity.
I would also question vague specifications. “High accuracy” sounds useful, but the actual percentage and measurement conditions matter more.
A lower-capacity tester may be the better choice for sensitive tests. I have found that the most expensive option is not always the most dependable one.
Evaluate Grips, Fixtures, and Specimen Compatibility
Buying the right tensile tester starts with the grips, not the machine frame. Grips must hold the specimen firmly without crushing, cutting, or creating stress concentrations. Serrated jaws may suit metals, but they can damage films, textiles, or soft polymers. Pneumatic grips provide consistent pressure for repeated testing. However, excessive pressure can still distort delicate samples. Fit matters more than appearance.
Check whether the available fixtures match your test methods and specimen shapes. Flat strips, round wires, molded plastics, and bonded joints often require different gripping solutions. The fixture should align with the load axis and prevent twisting during extension. Even slight misalignment can produce uneven fractures and unreliable strength values. Confirm the grip opening, force capacity, travel distance, and temperature compatibility before purchase. Small details matter.
Specimen compatibility also includes thickness, width, gauge length, and surface condition. A fixture designed for narrow samples may not secure wider ones safely. Review how the extensometer attaches, especially when measuring low elongation or flexible materials. In practical laboratory work, operators sometimes focus on maximum force and overlook jaw replacement costs. That is an expensive lesson. I would also test a few real specimens before approving the system. Catalog dimensions can look suitable, yet soft samples may slip during loading. Leave room for improvement. A reliable choice is the one that supports your actual specimens, operators, and test frequency.
Review Software, Standards, Safety, and Calibration Features
A tensile tester is only as dependable as its software and measurement controls. During a lab trial, open a raw data file, change a test setting, and check whether the system records that action. Good software should show force, displacement, strain, rate, and specimen ID clearly. It should export usable files, not locked reports. A confusing interface wastes time. Sometimes, an advanced dashboard hides basic errors.
Ask which standards the system supports, such as ASTM and ISO methods for your materials. Do not accept a long standards list without checking details. Gauge length, test speed, specimen dimensions, and calculation rules must match your procedure. The software should flag missing inputs before testing begins. This matters when several technicians share one machine. A common mistake is trusting the default method too quickly. That habit needs correction.
Inspect the guard, door interlock, emergency stop, overload protection, and travel limits. Test them physically. Calibration deserves equal attention. Confirm whether the load cell and extensometer can be calibrated across your working range, with traceable certificates and clear due dates. Ask how drift is detected between formal calibrations. Keep room for uncertainty. A machine may pass calibration yet produce poor results if grips slip or alignment is wrong. Request a demonstration with your actual specimen shape, then review repeatability, maintenance access, and training records before purchase.
10 Tips for Buying the Right Tensile Tester? - Review Software, Standards, Safety, and Calibration Features
| Tip | Buying Dimension | What to Review | Practical Requirement | Relevant Standards or Guidance | Verification Question | Why It Matters |
|---|---|---|---|---|---|---|
| 1Define the test application | Material and specimen type | Identify whether the system will test plastics, metals, rubber, textiles, films, composites, or other materials. | The load range, grips, specimen geometry, and travel must match the intended materials. | ASTM D638 ISO 527 ISO 6892-1 | Can the supplier demonstrate a complete test setup for the exact material and specimen dimensions? | A tester suitable for one material category may not provide the correct gripping, speed control, or measurement accuracy for another. |
| 2Size the load capacity correctly | Force measurement range | Compare the expected breaking force with the available load-cell capacity and the lower working range. | Select a capacity that covers the maximum expected force while preserving useful accuracy at the test load. | ASTM E4 ISO 7500-1 | What is the certified accuracy across the force range used by the laboratory? | Using an oversized load cell for low-force tests can reduce practical resolution and measurement confidence. |
| 3Check speed and displacement control | Crosshead speed and travel | Review speed range, speed accuracy, crosshead travel, return speed, and programmable test profiles. | The system should support the speeds and extension limits specified by the applicable test method. | ASTM D638 ASTM D882 ISO 527 | Can the software prevent tests from running outside the selected speed, travel, or extension limits? | Stress, strain, and elongation results can change significantly when the specified test speed is not maintained. |
| 4Review the grips and fixtures | Specimen gripping | Assess grip type, jaw faces, clamping method, alignment, interchangeable fixtures, and the risk of specimen slippage. | The grips must hold the specimen securely without causing premature damage or excessive stress concentration. | ASTM D638 ISO 6892-1 | Are the recommended grips appropriate for the specimen thickness, surface, width, and expected failure mode? | Grip slippage, jaw damage, and poor alignment can produce invalid results even when the force measurement is accurate. |
| 5Evaluate strain measurement | Extension and elongation | Compare crosshead displacement with an extensometer or other direct strain-measurement device. | Use a suitable extensometer when the method requires accurate gauge-length strain or modulus measurement. | ASTM E83 ISO 9513 ISO 527 | Is the extensometer removable, contact-based or non-contact, and rated for the required strain range? | Crosshead movement includes machine and grip compliance, so it may not represent the specimen gauge-length strain. |
| 6Review software capabilities | Test setup and data analysis | Check method templates, automatic calculations, pass/fail limits, curve overlays, user permissions, and export options. | The software should calculate required values such as tensile strength, yield strength, elongation, and modulus using documented methods. | ASTM D638 ISO 527 21 CFR Part 11 | Can test methods, raw data, revisions, and user actions be securely saved and retrieved? | Reliable software reduces transcription errors and supports repeatable, traceable reporting. |
| 7Confirm standards support | Method compliance | Verify that the instrument configuration and software calculations support the current revision of the required methods. | The supplier should identify which parts of each standard are supported and which require laboratory procedures. | ASTM D638 ASTM D882 ISO 527 ISO 6892-1 | Will the supplier provide a compliance matrix, method documentation, and controlled software updates? | Standards specify more than force capacity; they can also define specimen preparation, speed, conditioning, calculations, and reporting. |
| 8Inspect safety functions | Operator protection | Review emergency stop controls, guarding, interlocks, overload protection, travel limits, and safe return behavior. | The system should prevent hazardous movement and provide accessible emergency stopping during operation. | ISO 12100 IEC 60204-1 | Are safety functions documented, tested during commissioning, and included in the operating instructions? | Tensile tests can release stored energy or produce sharp fragments when specimens fracture. |
| 9Verify calibration and traceability | Calibration program | Review calibration certificates, force verification, displacement verification, extensometer calibration, and service intervals. | Calibration should be performed using documented procedures and standards traceable to a recognized national metrology institute. | ASTM E4 ISO 7500-1 ISO 9513 ISO/IEC 17025 | What is included in the calibration certificate, and who is authorized to perform recalibration? | Traceable calibration helps demonstrate that reported force, displacement, and strain values are technically defensible. |
| 10Assess service, environment, and total cost | Lifecycle support | Consider installation, training, preventive maintenance, spare parts, software support, environmental conditions, and future expansion. | Confirm the required temperature, humidity, electrical supply, floor space, ventilation, and network conditions before purchase. | ISO/IEC 17025 ISO 9001 | What are the expected maintenance tasks, response times, training options, and costs for additional fixtures or load cells? | Serviceability and documented support affect uptime, measurement continuity, and the total cost of ownership. |
Assess Installation, Service, Cost, and Long-Term Value
10 Tips for Buying the Right Tensile Tester
Installation should be your first practical checkpoint. Measure doorways, floor space, bench height, and electrical access before requesting a quotation. Check whether the frame needs anchoring or vibration control. Review load capacity, crosshead travel, grip compatibility, and specimen dimensions together. A powerful machine is useless if your samples cannot fit. Ask for a site preparation document. It prevents expensive surprises.
Service quality affects every test after installation. Request a written response time, calibration schedule, training plan, and spare-parts policy. Confirm who performs repairs and whether support is available remotely. Ask for references from laboratories with similar workloads. During acceptance testing, compare readings with certified reference materials. Keep the records. They support reliable results and future audits. Software updates also deserve attention, since neglected systems can interrupt routine testing.
Cost should include grips, fixtures, installation, training, calibration, maintenance, and downtime. Compare the total cost over five years, not only the invoice price. Ask how future upgrades are priced. A cheaper frame may limit new materials or higher loads later. I have seen buyers focus on the machine and overlook operator training. That mistake is easy to repeat. Leave time for trial tests, method development, and honest feedback from daily users. No checklist is perfect. Revisit it after six months of operation.
Related Posts
-
China Top Tensile Machine Manufacturers Which One to Choose?
-
Why Investing in a Tensile Tester Can Transform Your Quality Control Process
-

Ultimate Guide to Tensile Testing Machines Benefits Features and Applications
-
Essential Guide to Understanding Universal Tensile Testing Machines for Accurate Material Analysis
-
How to Choose the Right Tensile Testing Machine for Your Needs?
-
What Are the Best Tips for Using a Tensile Strength Machine?
Have Questions? We're Here to Help!
Give us a call at (864) 989-0566 or send us a message to discuss our testing equipment with an expert.